So there was an entirely too-large gap between now and my last SRP update post. Unfortunately, I got slapped upside the head with a two-week-long depressive low that just left me without any energy to do anything whatsoever.
However! That’s now dead for the time being, and I’ve had a rather large burst of creative energy off the back of my slump. There have been quite a number of improvements and developments since my last posting, so I’ll just cover the main bits so as not to make this into yet another novella.
Railings

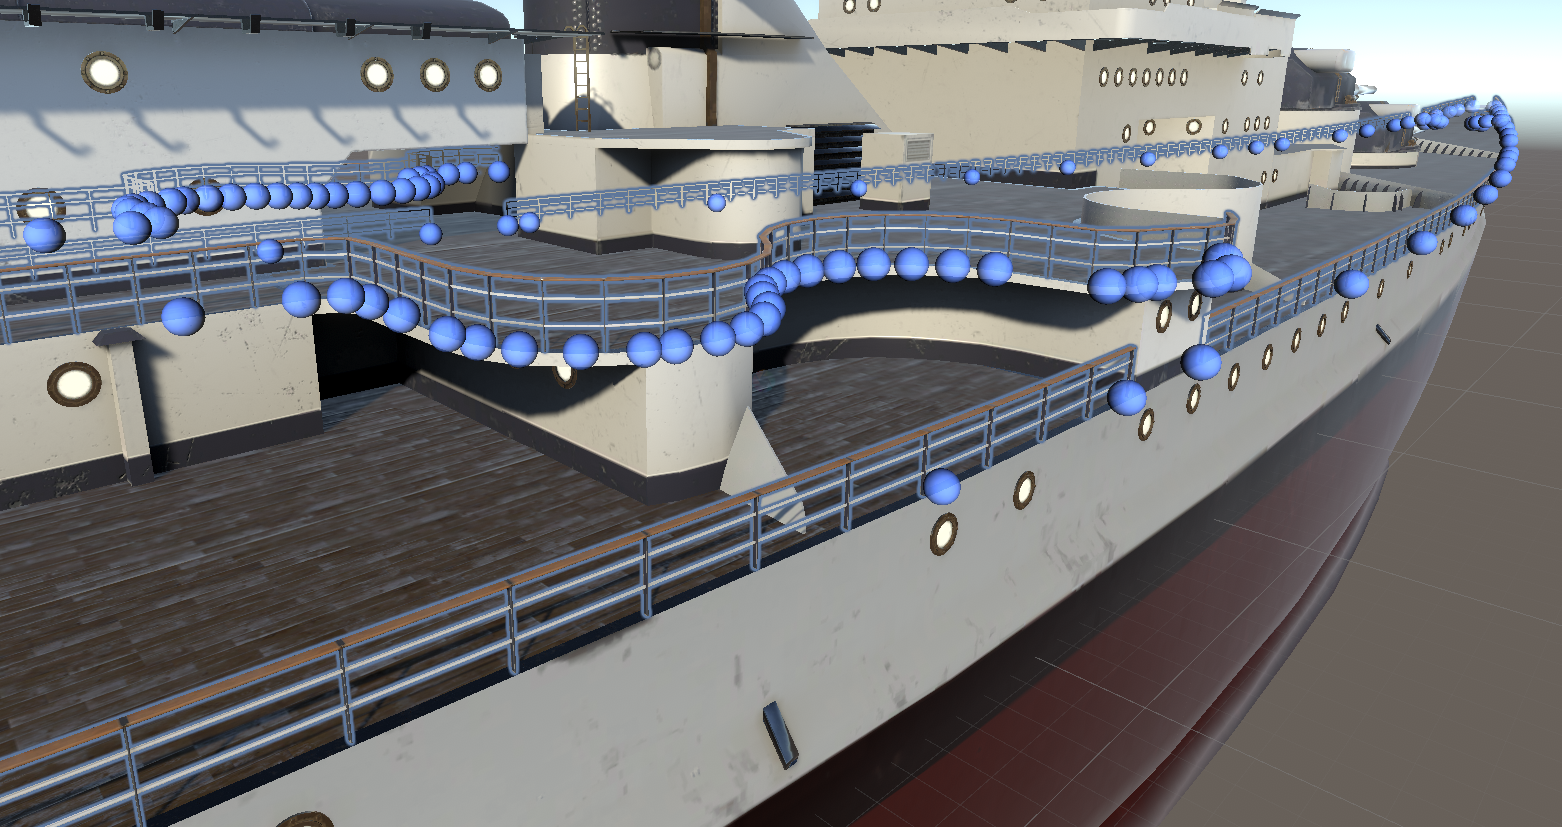
The first major thing to report about is the fact that the ship now has railings to prevent people from falling off. This was accomplished by making an actually rather simple model in Blender, consisting of one support beam, two crossbars, a wooden hand rail, and an end cap. The rails don’t have faces on the inside edge, but the end cap does.
Then, I plugged the lot into an editor extension called EasyRoads3D. Basically, what this does is automatically place the support beams every so often (2 meters on the main deck, 1 meter on tighter areas and upper decks), stitch together and tessellate the rails to create a tiled “road”, and place the end cap piece at either end of the “network”. Then, all I have to do is start placing down nodes to draw in the railings, and EasyRoads3D does all the heavy lifting.
I won’t bore you with the technical details on how I got this working, but it basically boils down to setting up the railings as a “Side Object”, then creating a Road Type with the “Is Side Object” flag checked and the railing object enabled.
A Metal Cable Material
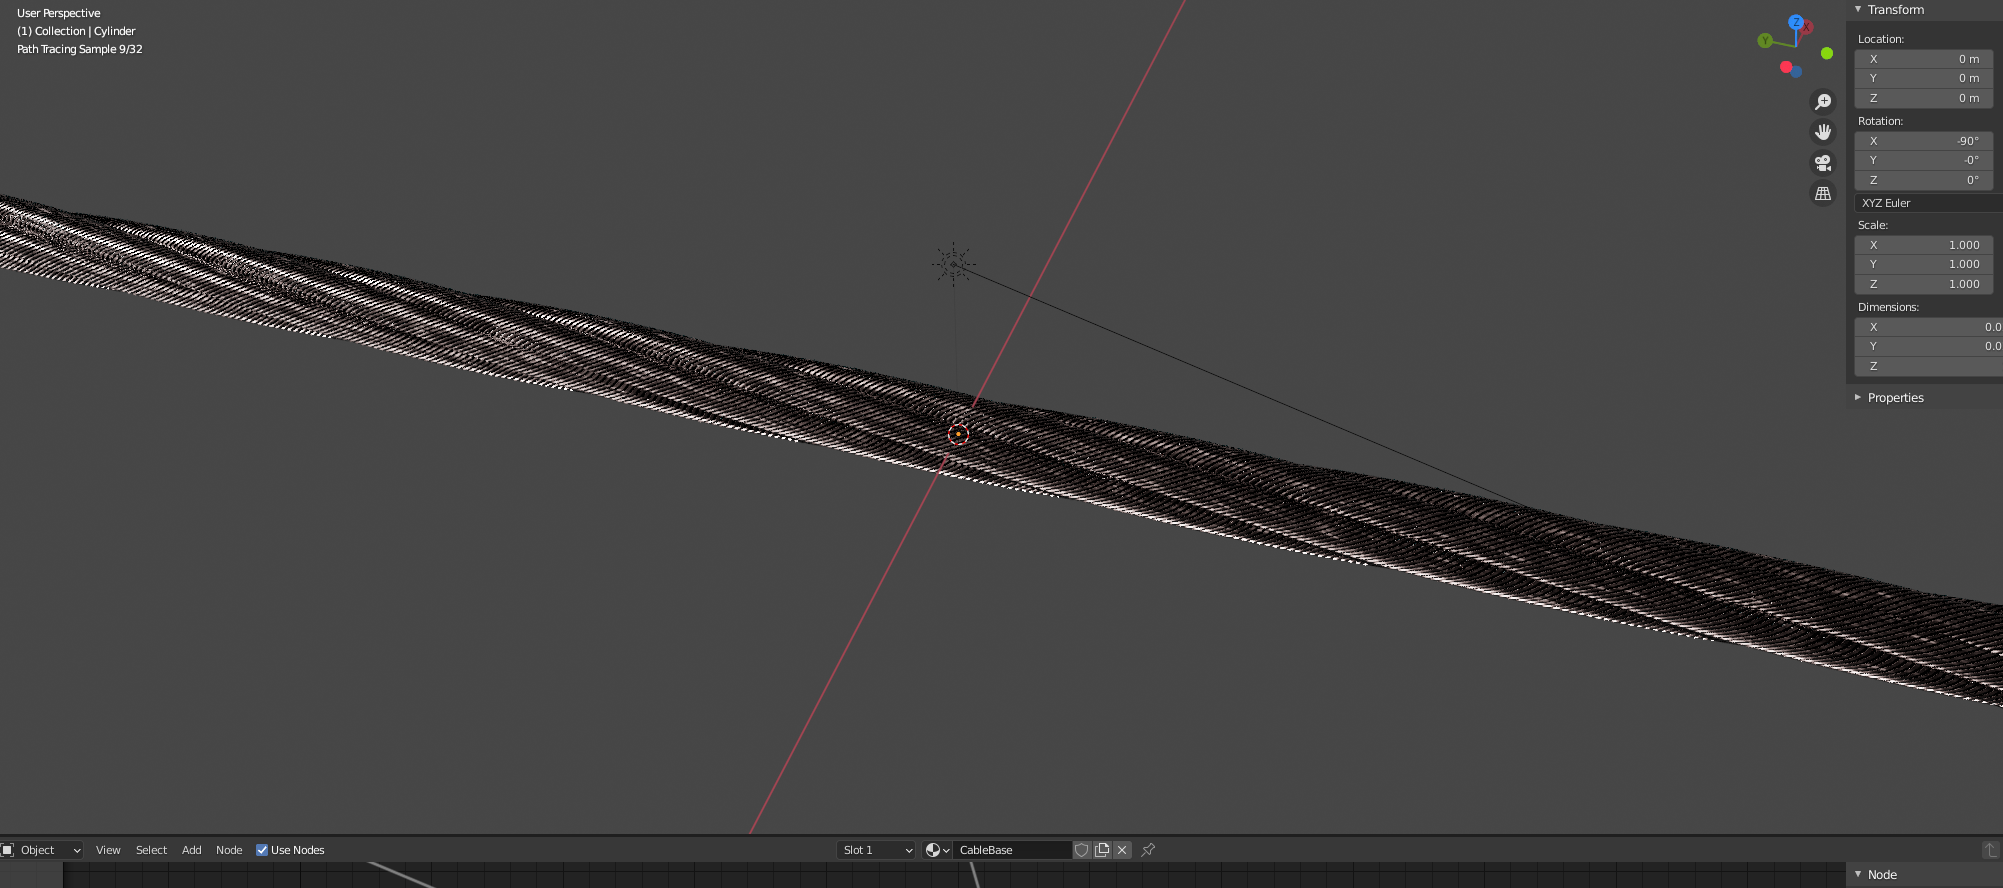
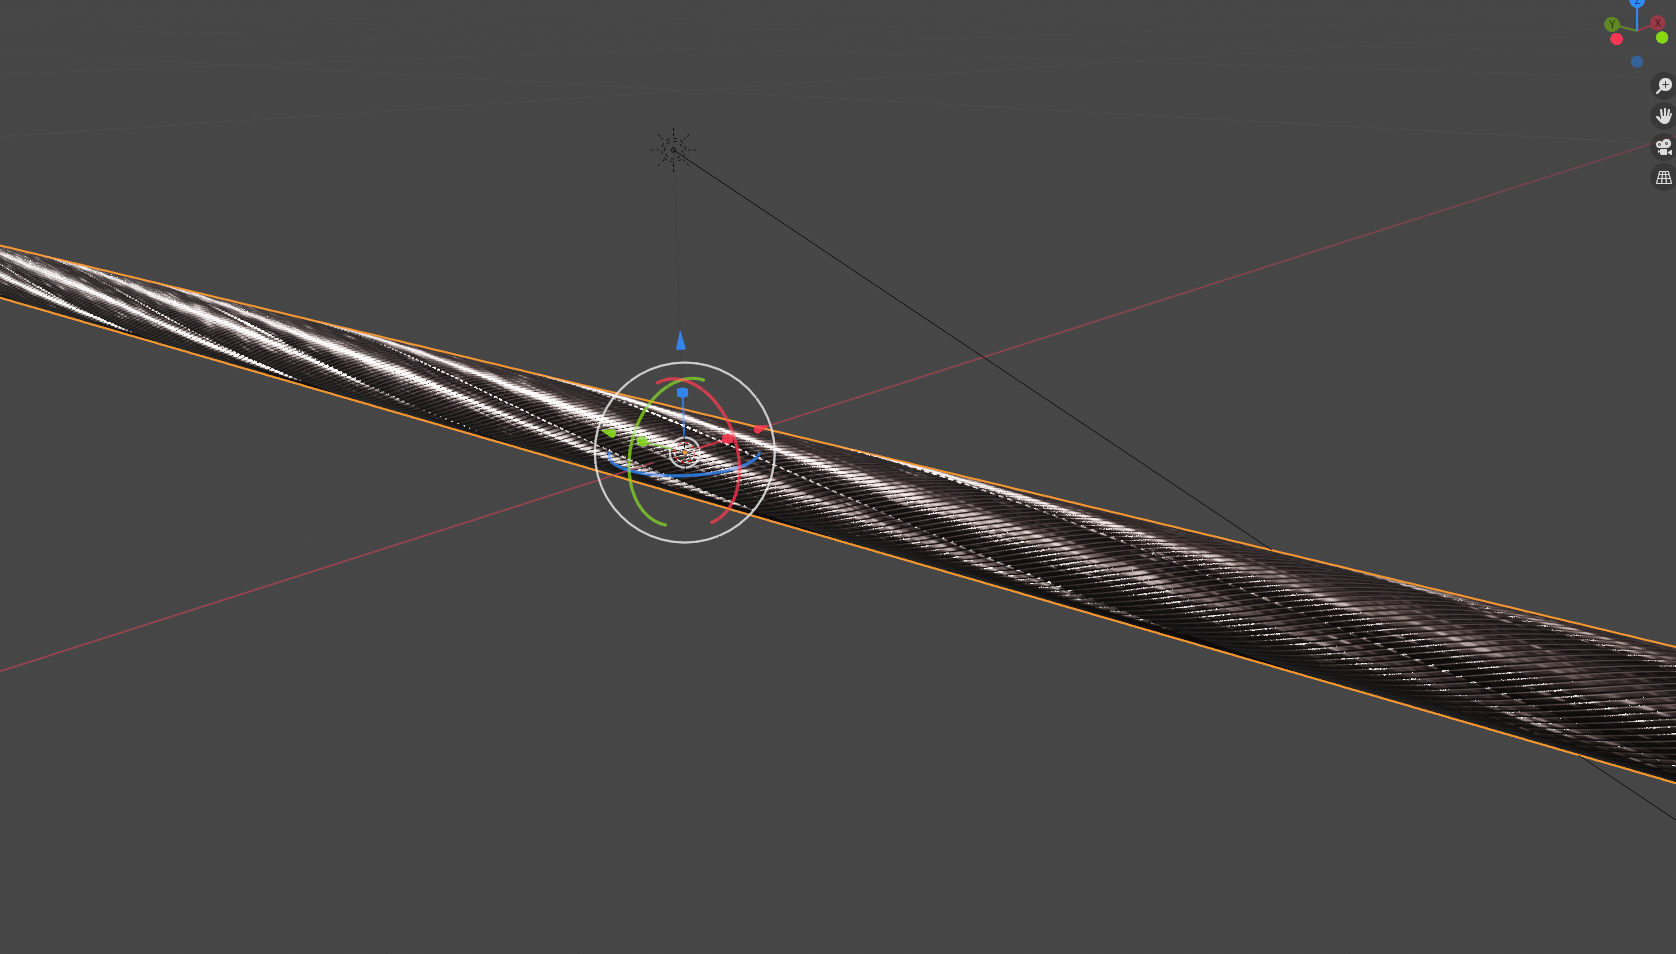
In the interim between me actually doing things and me procrastinating from doing things, I decided that we would need a metal wire/cable material to play with for things like flags and tie-downs. So, I set out to make one. The first iteration didn’t go too awfully well. It essentially was a cylinder with a displacement based on a wave texture to make it LOOK like it was a bunch of wires, but the subdivision required for said displacement kicked the polycount up to 2.3 million polygons. Also, when I baked it down to a texture, the spiral twist texture wasn’t different for each “sub-wire”, so it looked like one big metal candy cane.
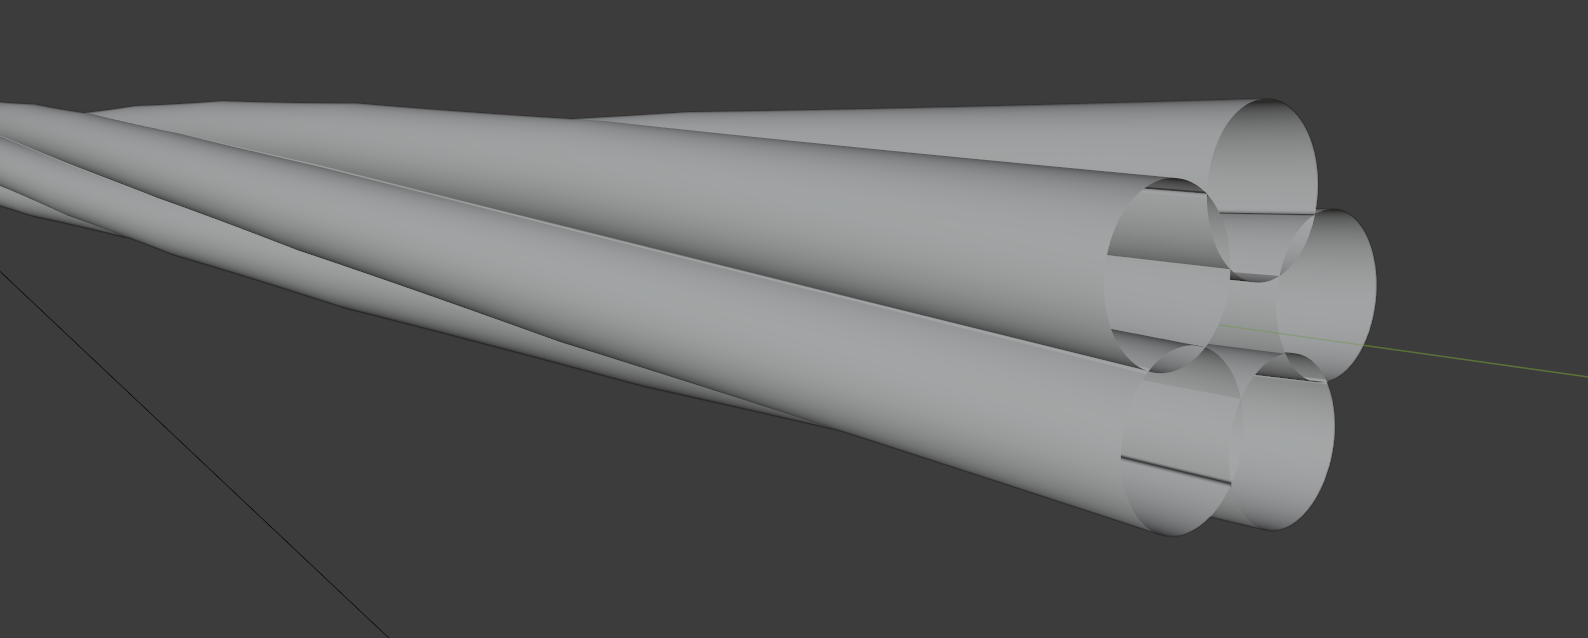
After the failure of the first attempt, I reset and tried again. The basic structure of this cable was laid out about how one would expect a real twisted metal cable to be: 5 twisted cylinders stretched out into a cable. This was achieved quite simply, just with a Circle in Blender with the Screw modifier applied out to 1 meter. Then, an object-based Array modifier to make the other four cables.
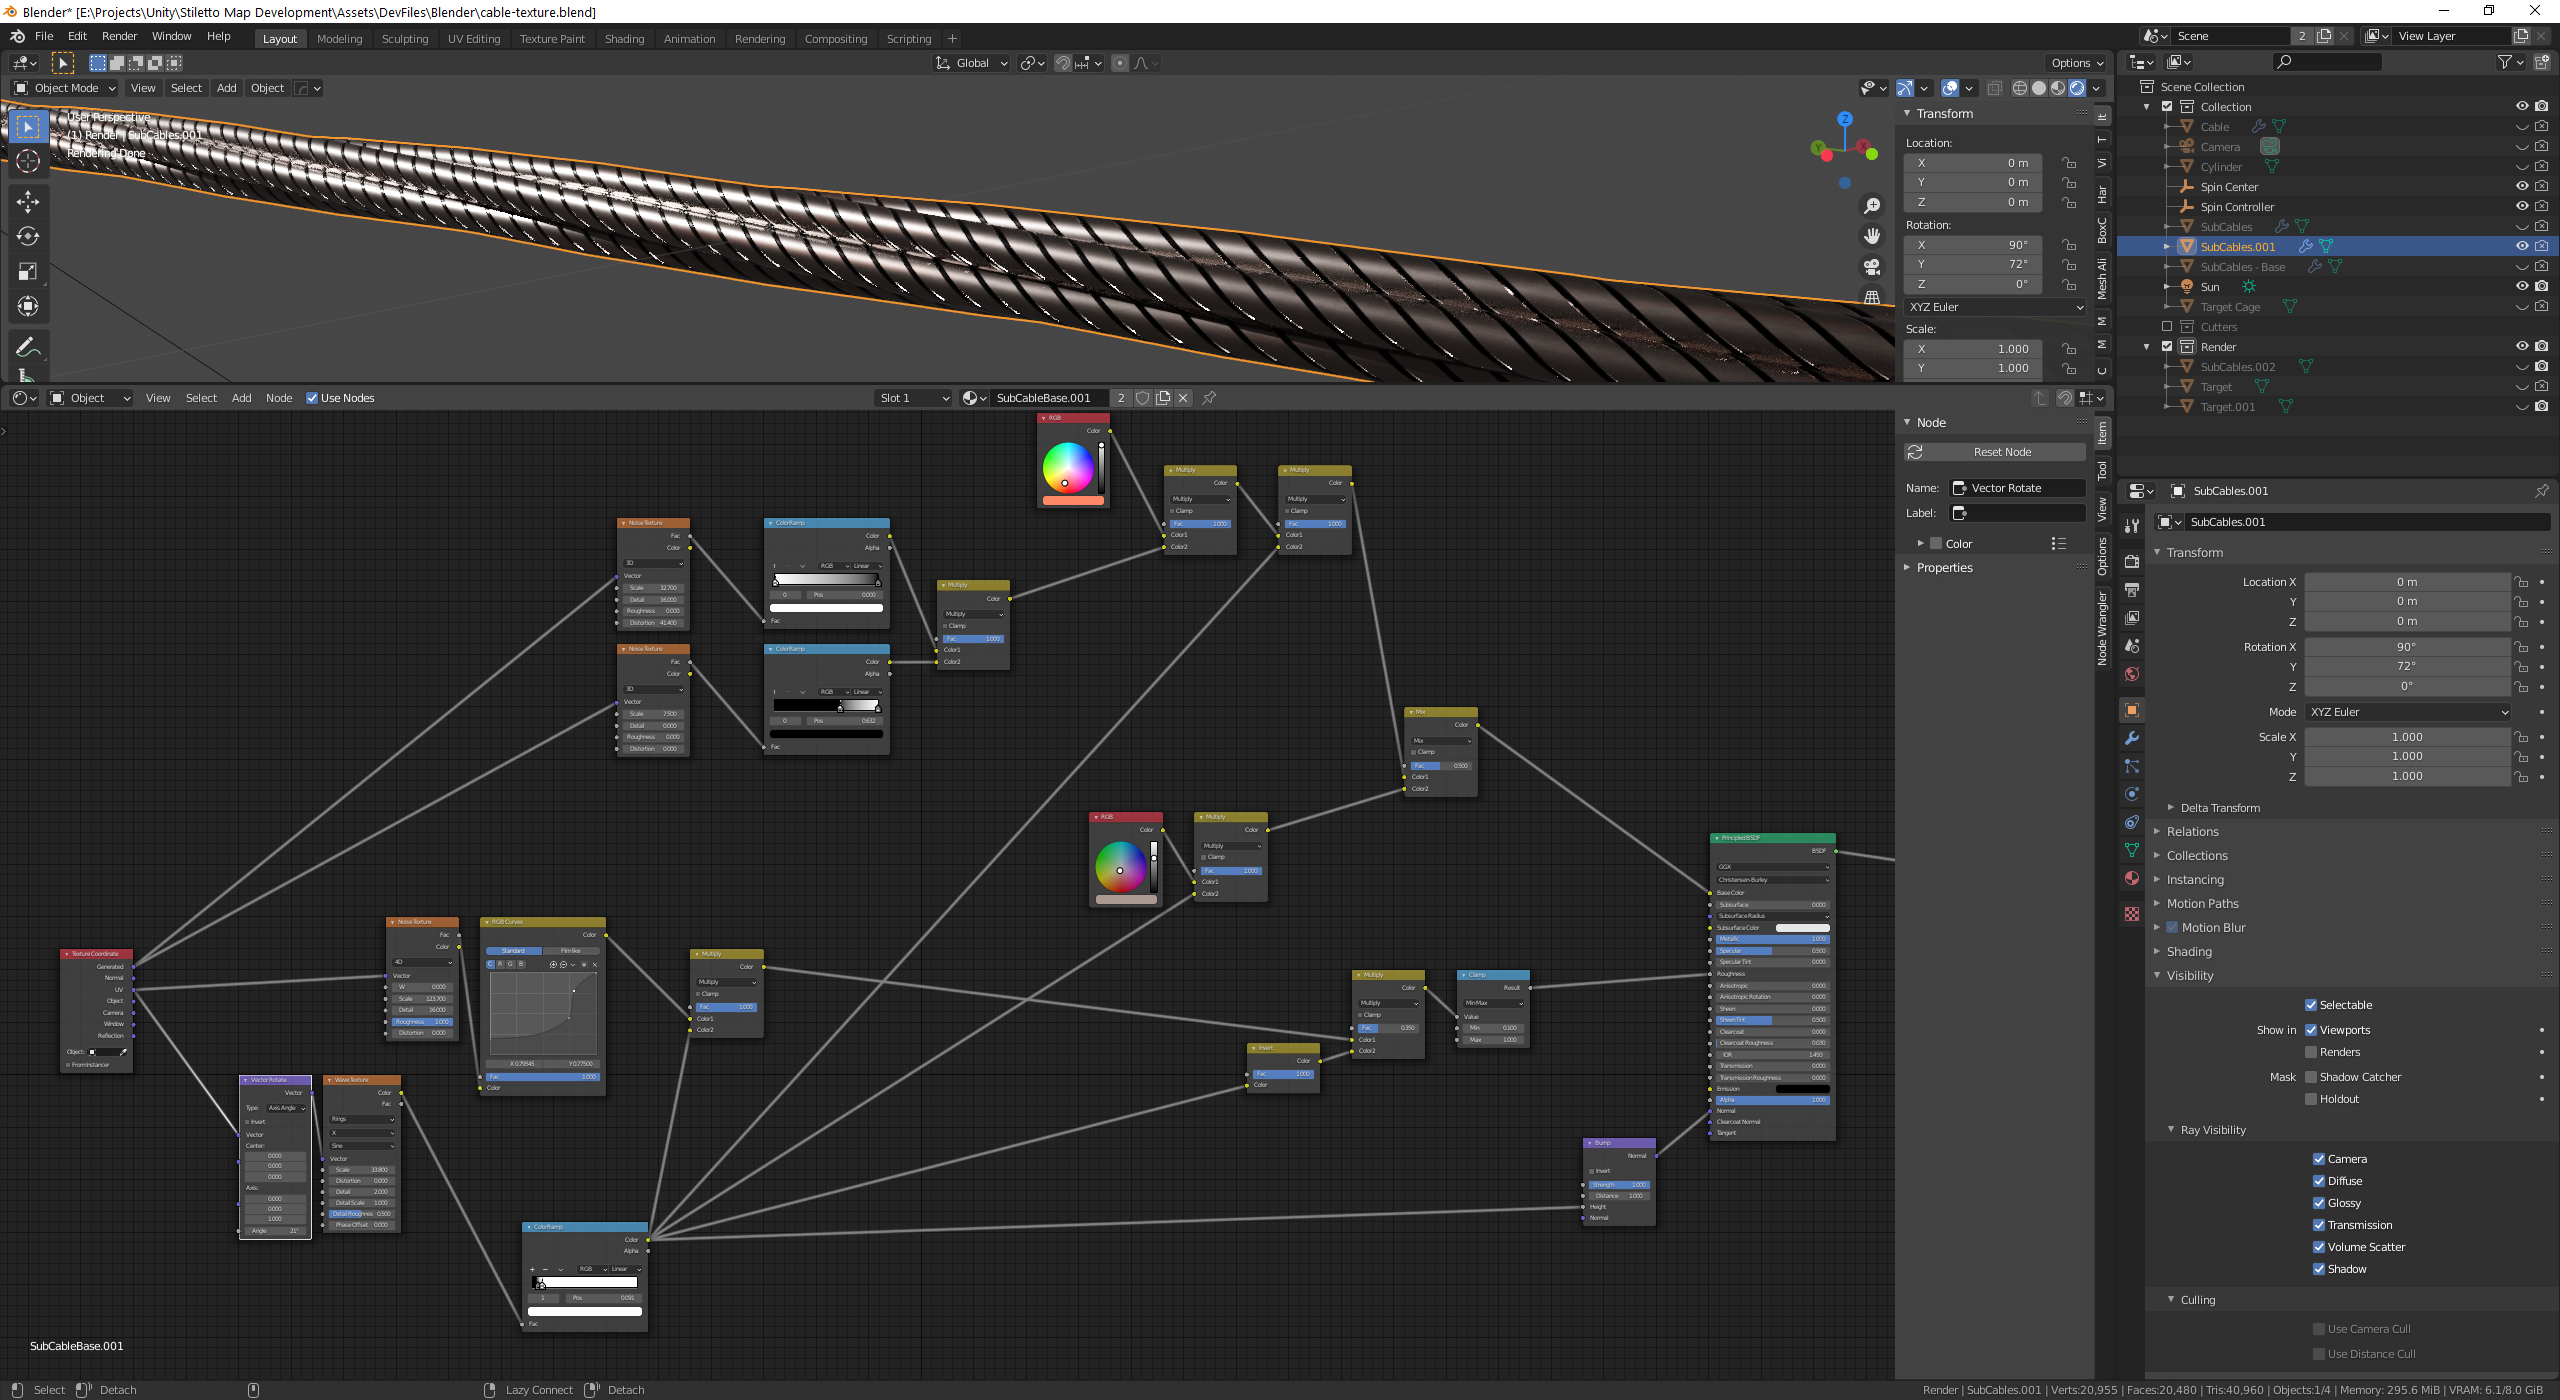
The next step was of course making some sort of texture for the geometry. To boil that shader graph down to less spaghetti terms, I used a Wave Texture input, rotated slightly, to generate the inner wires for each twist. Then, I did a bunch of multiplies and color ramps to throw in some degradation into the material to give it a more “aged” feel.
After that, it was down to baking it all to a texture. Unfortunately, because I was baking at 8192×8192 and downsampling to 4k textures, the baking took about an hour and 20 minutes. The end result turned out passable enough:
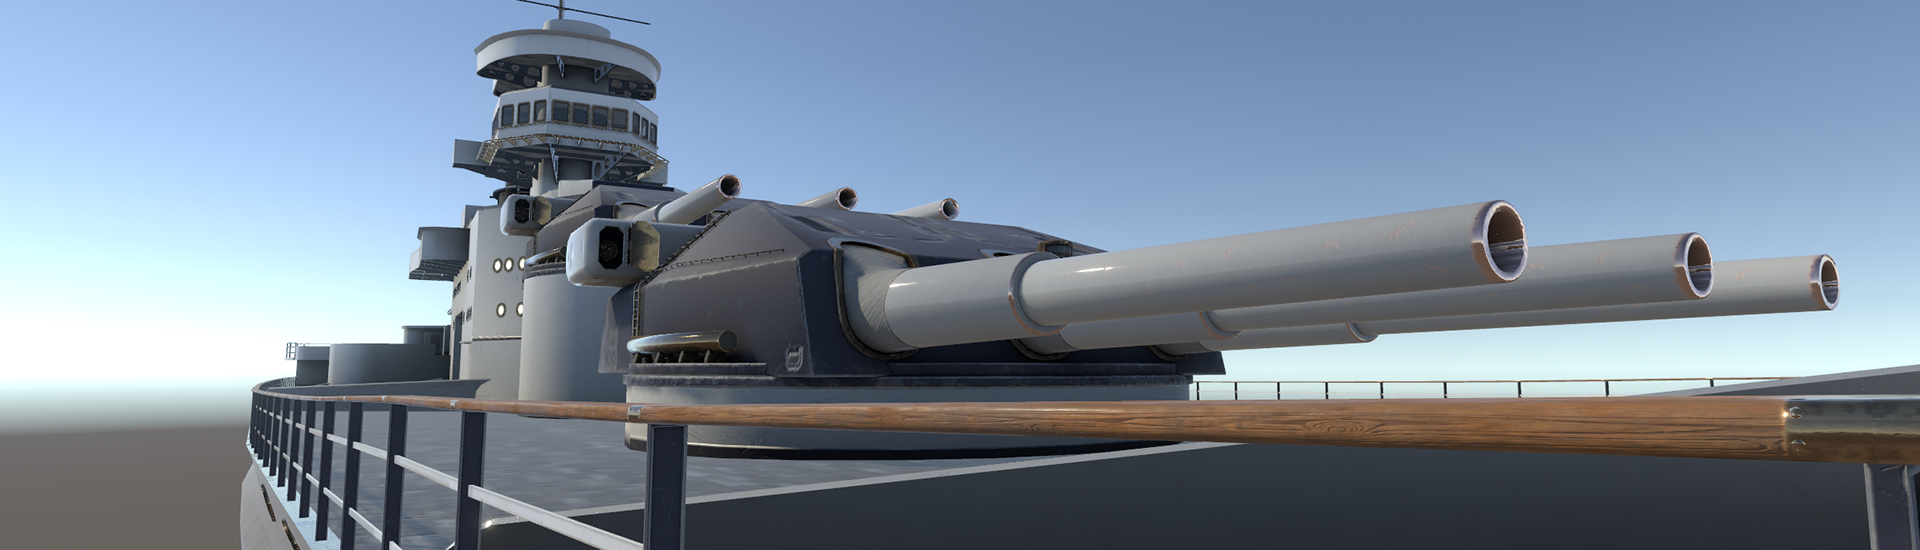
The Bridge
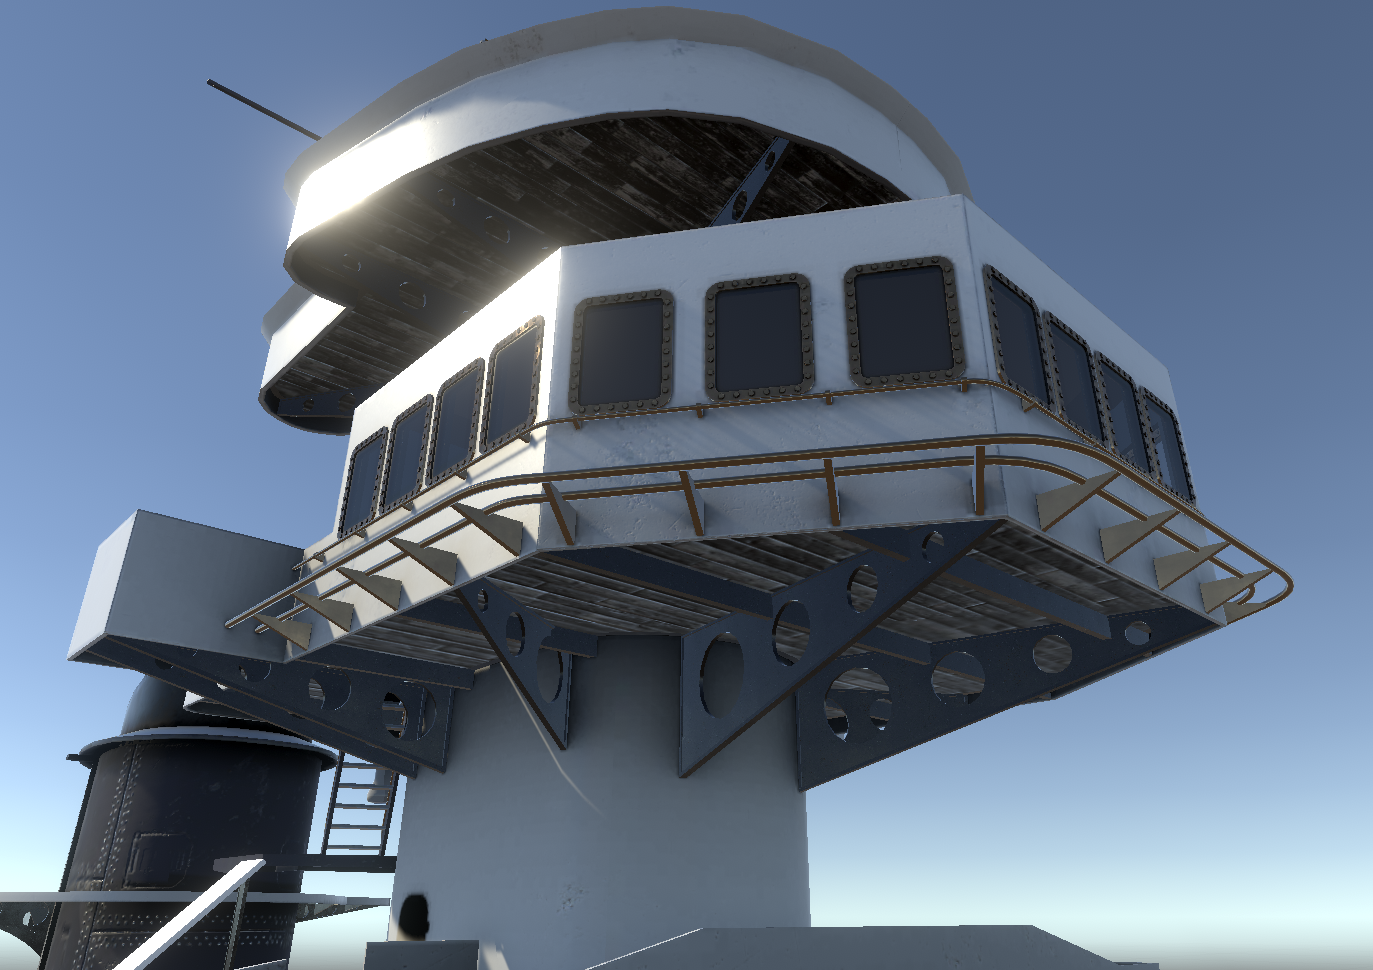
The main chunk of work over the past couple of weeks has been the Bridge model. There’s not TOO awfully much to write about here, but I really do like how it all came out. Currently, I’ve only painted the bridge’s exterior, and the interior is still untextured, but the goal right now is to get the exterior all up and running sooner rather than later.
This started out as a direct trace of the original World of Warships reference model, but that one’s bridge is basically a closet stapled to the side of the core. Also, it’s rounded kinda like a bus and not some ironclad warship. I don’t know how accurate the WoWS Scharnhorst is to the real ship, but the bridge on that was way too small for any sort of use. So, I opted to yoink the bridge shape from the USS Iowa and go for a much more angled (and much larger) bridge.
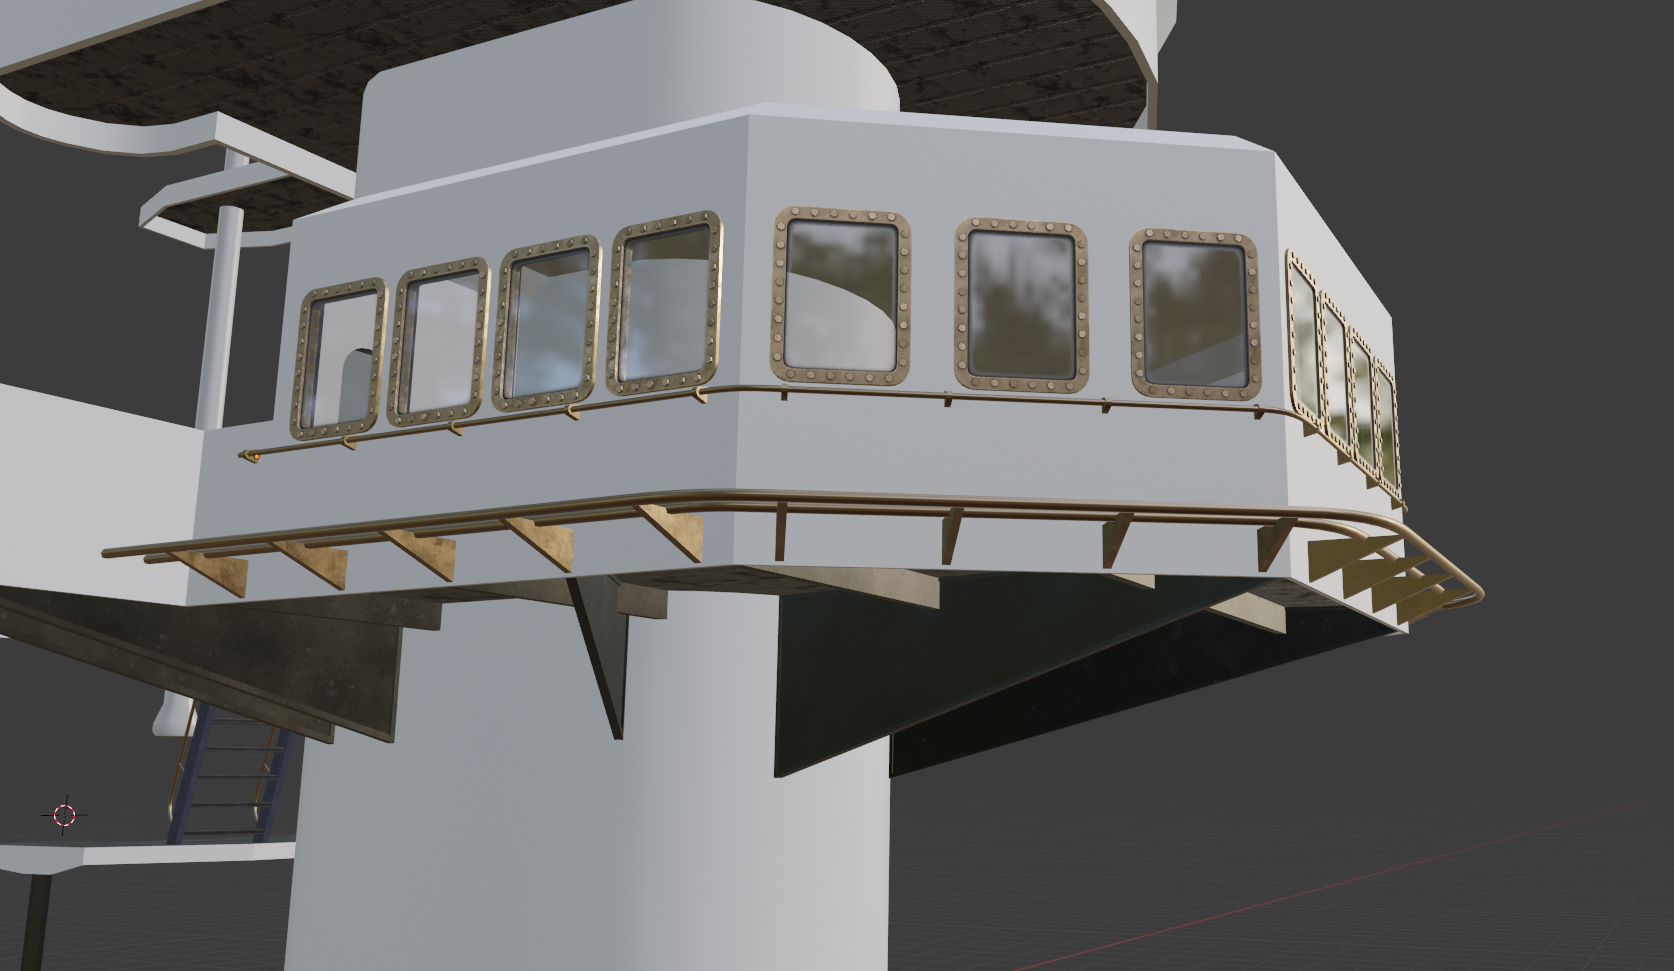
The bridge windows are simple enough, basically just a rounded cuboid with a hole cut through it and a bunch of hexagonal prisms glued onto the outside. However, I do believe they very much look the part.
Also, as can be seen above, this is the first of the Superstructure objects to get some proper detailing around the exterior. I went a bit crazy with the Bezier Curves to generate some railings for maintenance and window washing around the outside of the bridge, along with a third tie-off rail placed presumably so people don’t trip and fall to their untimely RP deaths.
A More Compressed Shader
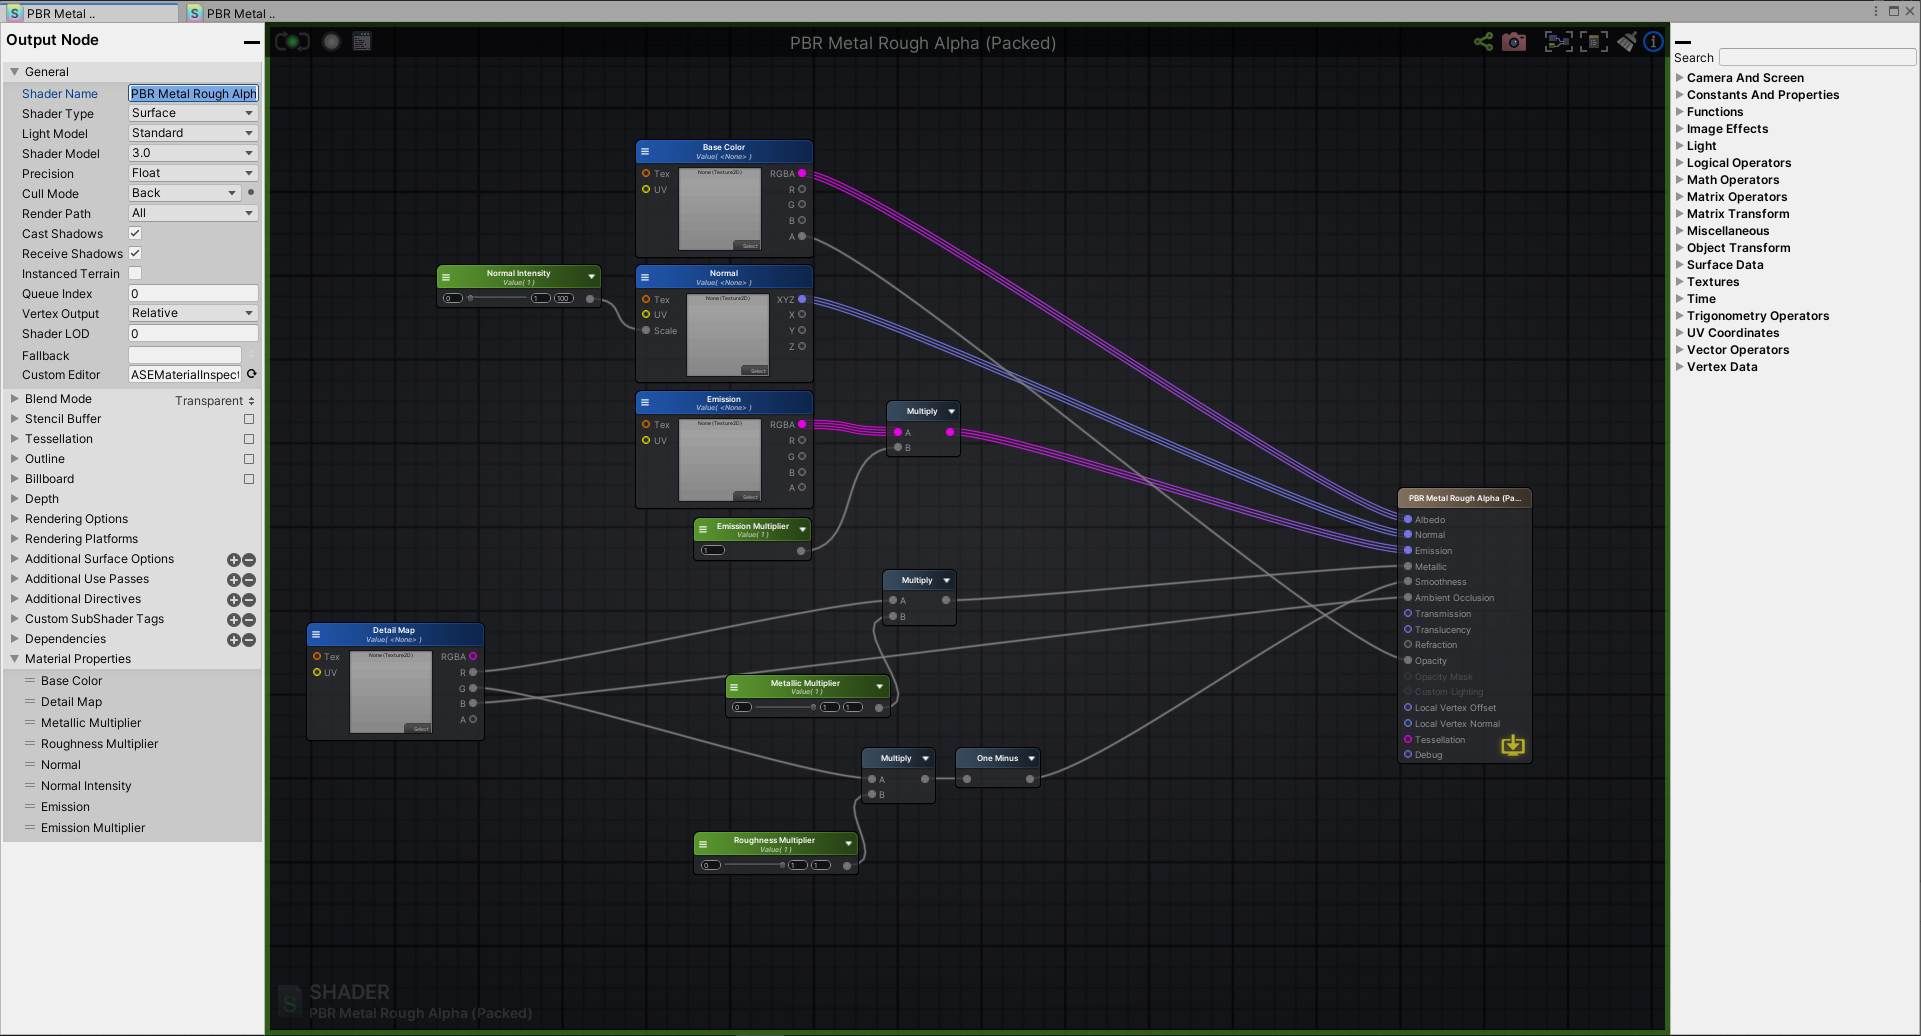
Okay, so the section title is actually nonsense, since shader compression isn’t really a thing. However, it’s more accurate to say that this new shader allows for better compression of texture maps.
The current PBR (Physically Based Rendering) Metal-Rough shaders have one map for all the inputs: Albedo, Metalness, Roughness, Ambient Occlusion (AO), Emission, and Normals. This has quite a bit of overhead on both Map download size and Texture Memory footprint. However, the quality of the materials that come from PBR are worth the churn.
Now, this new shader set that I whipped up in Amplify Shader Editor takes into account the fact that three of those maps only require one numeric input (greyscale); Metal, Roughness, and AO are all scalar, not RGB. Because of this, we can pack all three of those maps into one and essentially cut out 6 color channels worth of unneeded data.
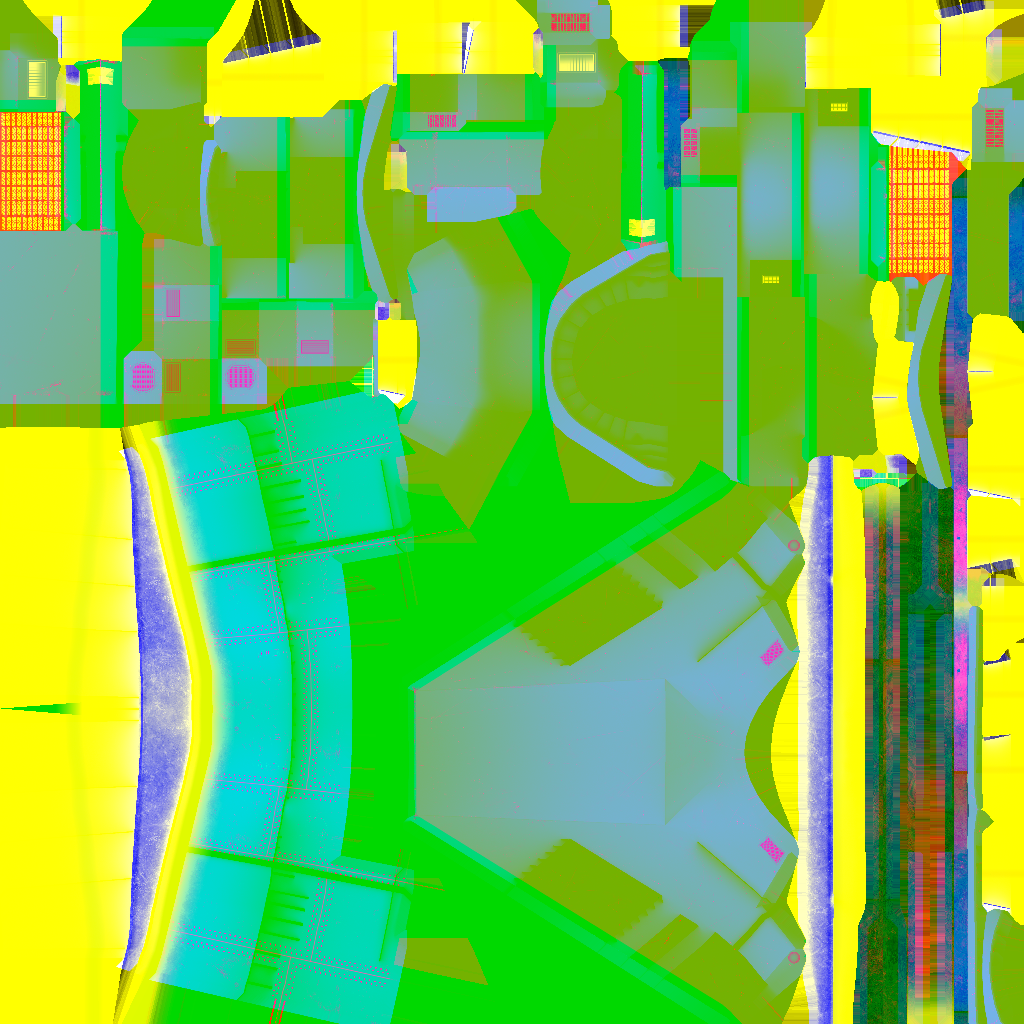
As can be seen and burnt into your retinas, this ends up creating some delicious Tutti-Frutti nonsense, since each map is in its own color. And yes, that is the “Detail Map” (as I’ve been calling it) for the midships smoke stack on the superstructure. The Detail Map has Metalness on the Red channel, Roughness on the Green channel, and AO on the Blue channel.
This allows us to knock down the overhead to that of ONE texture map rather than three. In setting up the VRC map and materials with this new shader and its Detail Map, it creates enough breathing room in the map size that I was able to go through and decompress the Superstructure Normal maps, which was causing some weird lighting artifacts at oblique angles.
However, this is not without its drawbacks. Not only is the map an eyesore, but it can no longer be Crunch Compressed. Crunch Compression is basically Unity’s method of applying some lossy compression to a texture to get a MUCH smaller size, at the cost of some artifacting. When this artifacting is applied to a map where each color needs to be separate, however, “Bleed” can occur between the channels, causing some pretty damned bad texture garbage.
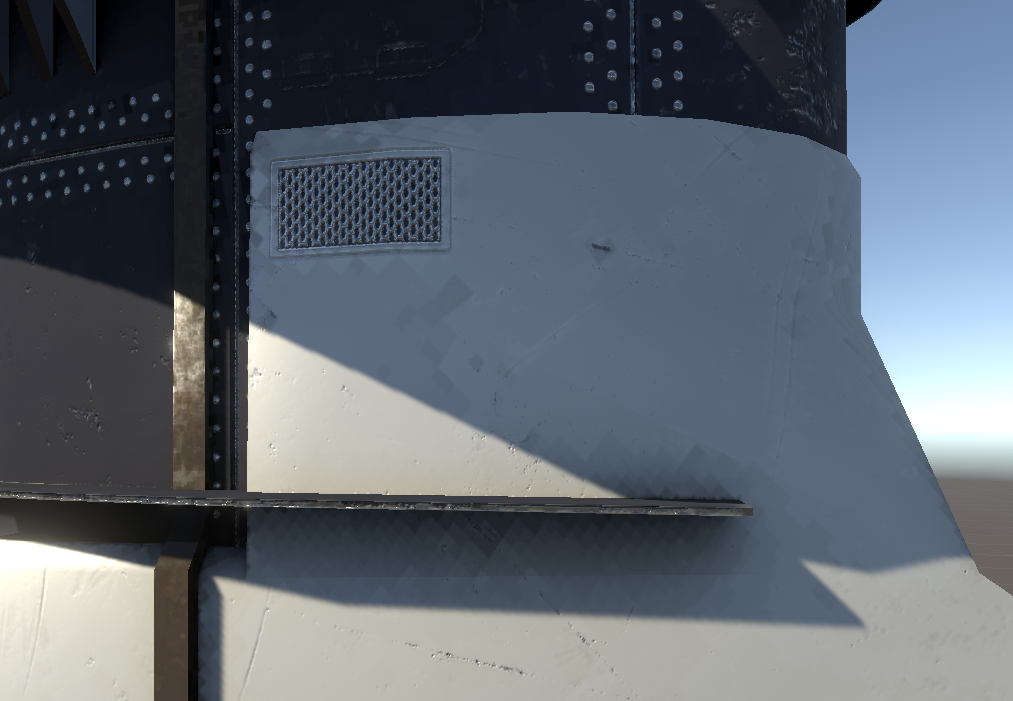
As can be seen here, the Metal, Roughness, and AO maps have bled into one another, making this weird blocky mess. However, since we’re running uncompressed textures now, we can reduce the resolution of the map further before muddiness occurs. Overall, the texture sizes end up being smaller in both memory and download size.
Conclusion
We still have a long way to go. Unfortunately, as one can see on most any of these screenshots, the Stiletto is still looking much too modern for the Fantasy setting we’re going for. We’ve got wood and brass everywhere, but we’ve got to work on tuning the design a bit. Luckily, we’re still early in the block-out phase, so redesigns aren’t too awfully horrendous to pull off. I myself am considering big brass corner braces on the harder corners of the superstructure, in hopes that it’ll look a little more steampunk or dieselpunk.
However, that’s something for the next post. I should wrap this one up at around here. Here’s hoping I have enough to write about in 2 weeks’ time rather than…what was it, 6 weeks since the last one?
Either way.