As can be seen in the title, I feel as though I have made some quite decent progress in learning the ins and outs of Blender and Substance Painter. This week saw the completion of three new models for the “workshop set” that I’m currently working on, two of them simple and one that was surprisingly more annoying. I also took a dip into shader construction to improve the value of the Repulsor Pistol. More on that in a bit.
Tool Chest
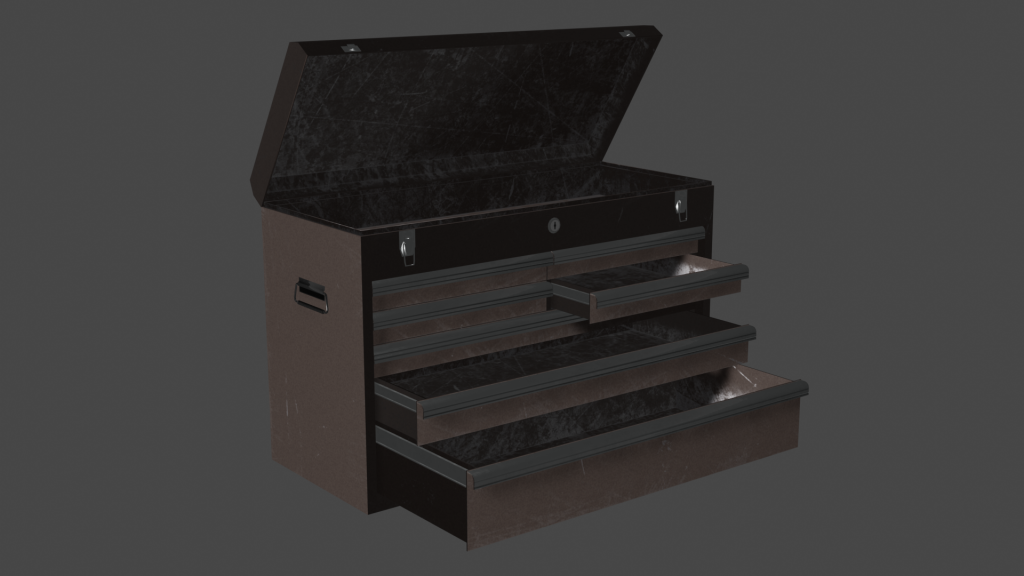
The first model I made is the more complicated one. On the surface, it’s rather basic; just a bunch of cuboids with some detaily bits here and there. However, the main issue was fixing all the janky polygons from boolean operations, and figuring out the best way to UV Unwrap a big pile of concave objects. I eventually settled on something that mostly works, though most of the shelf rails share the same UV map to save on complexity.
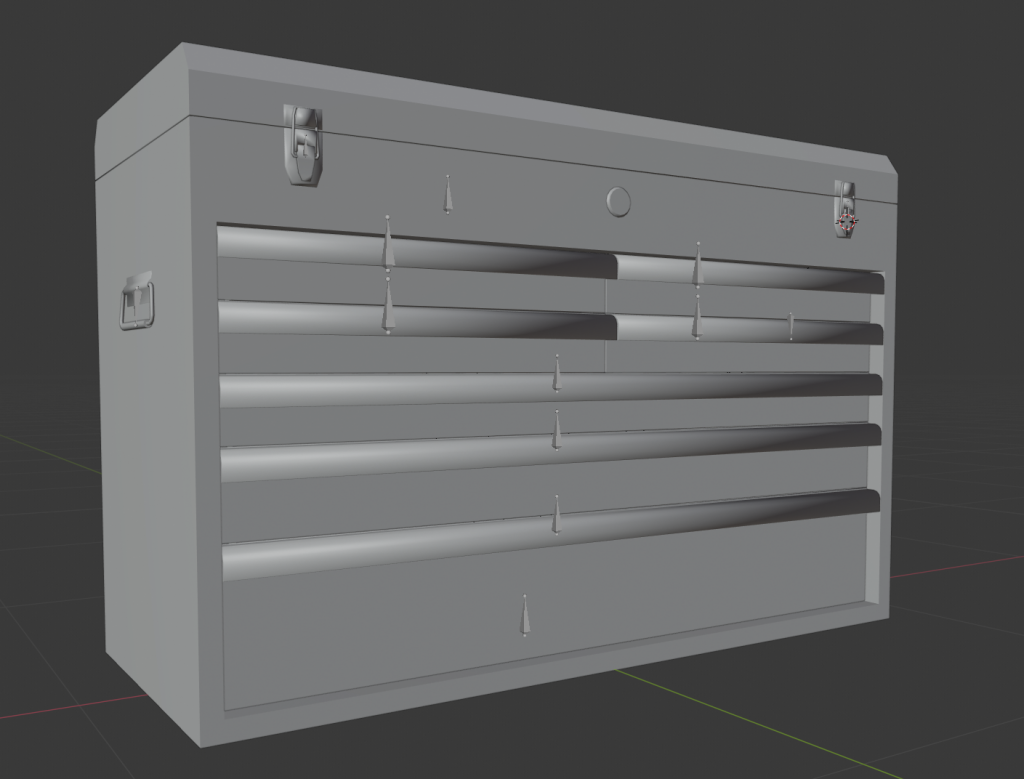
Now here’s the main bit of complication for this thing. In my infinite wisdom, I decided to make damned near every part of the tool chest it’s own moving object. This required a lot of non-connected bones, including two each for the hasp latches for the lid (I also learned that those little flippy hinge latches are called Draw Hasp Latches, the more you know). Even the little handles on the sides have their own bones. This made weight painting somewhat more time consuming. Not as bad as a full character rig, but still annoying.
The Vice
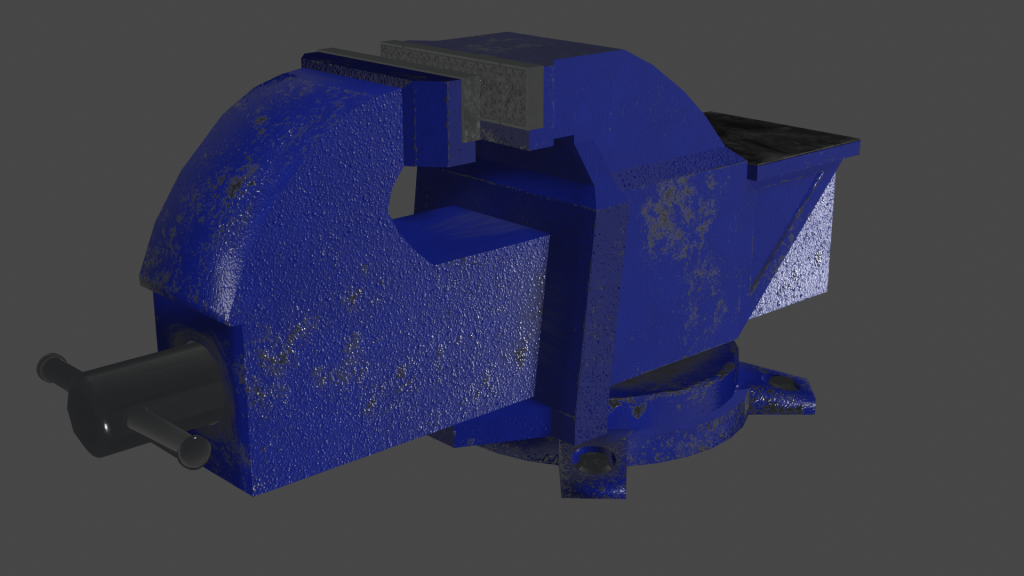
Not much to say about this one. This is a pretty simple model that only took about one day of work to complete, both in modeling and texturing. The main annoying bit was basically just making sure the clamp grips aligned correctly, though the UV Mapping, as can be expected, did put up a bit of a fight with the odd combination of sharp and rounded edges.
The Bin
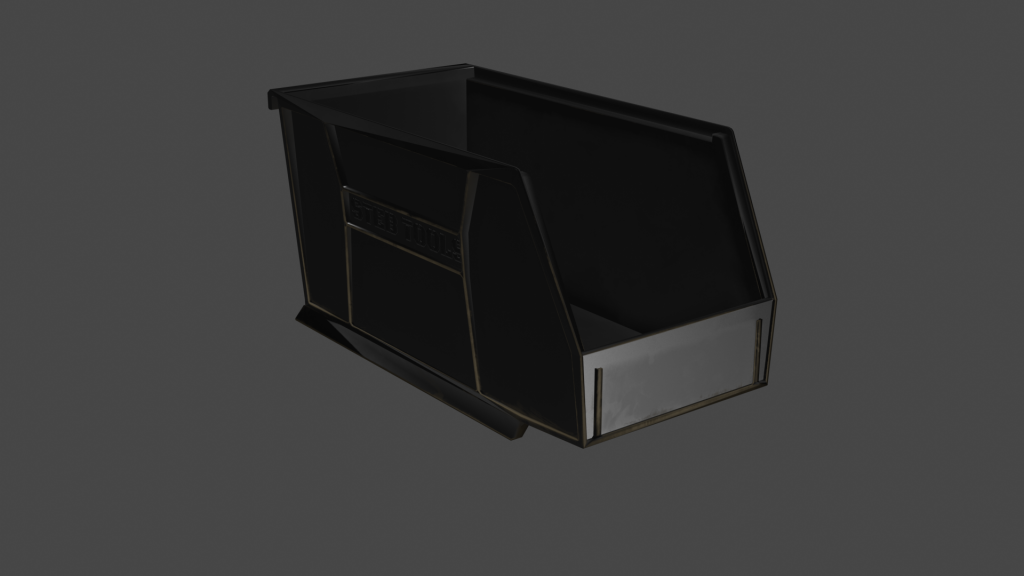
Again, not too much to say about this one. This is a little plastic tub used for filler in a scene. The main issue was getting those little support struts on the edges to not go completely stupid. However, this didn’t require any moving parts, so it doesn’t even have an armature setup. It does, however, stack on itself without clipping, as can be seen from the little dip on the top inside edge.
The Shader
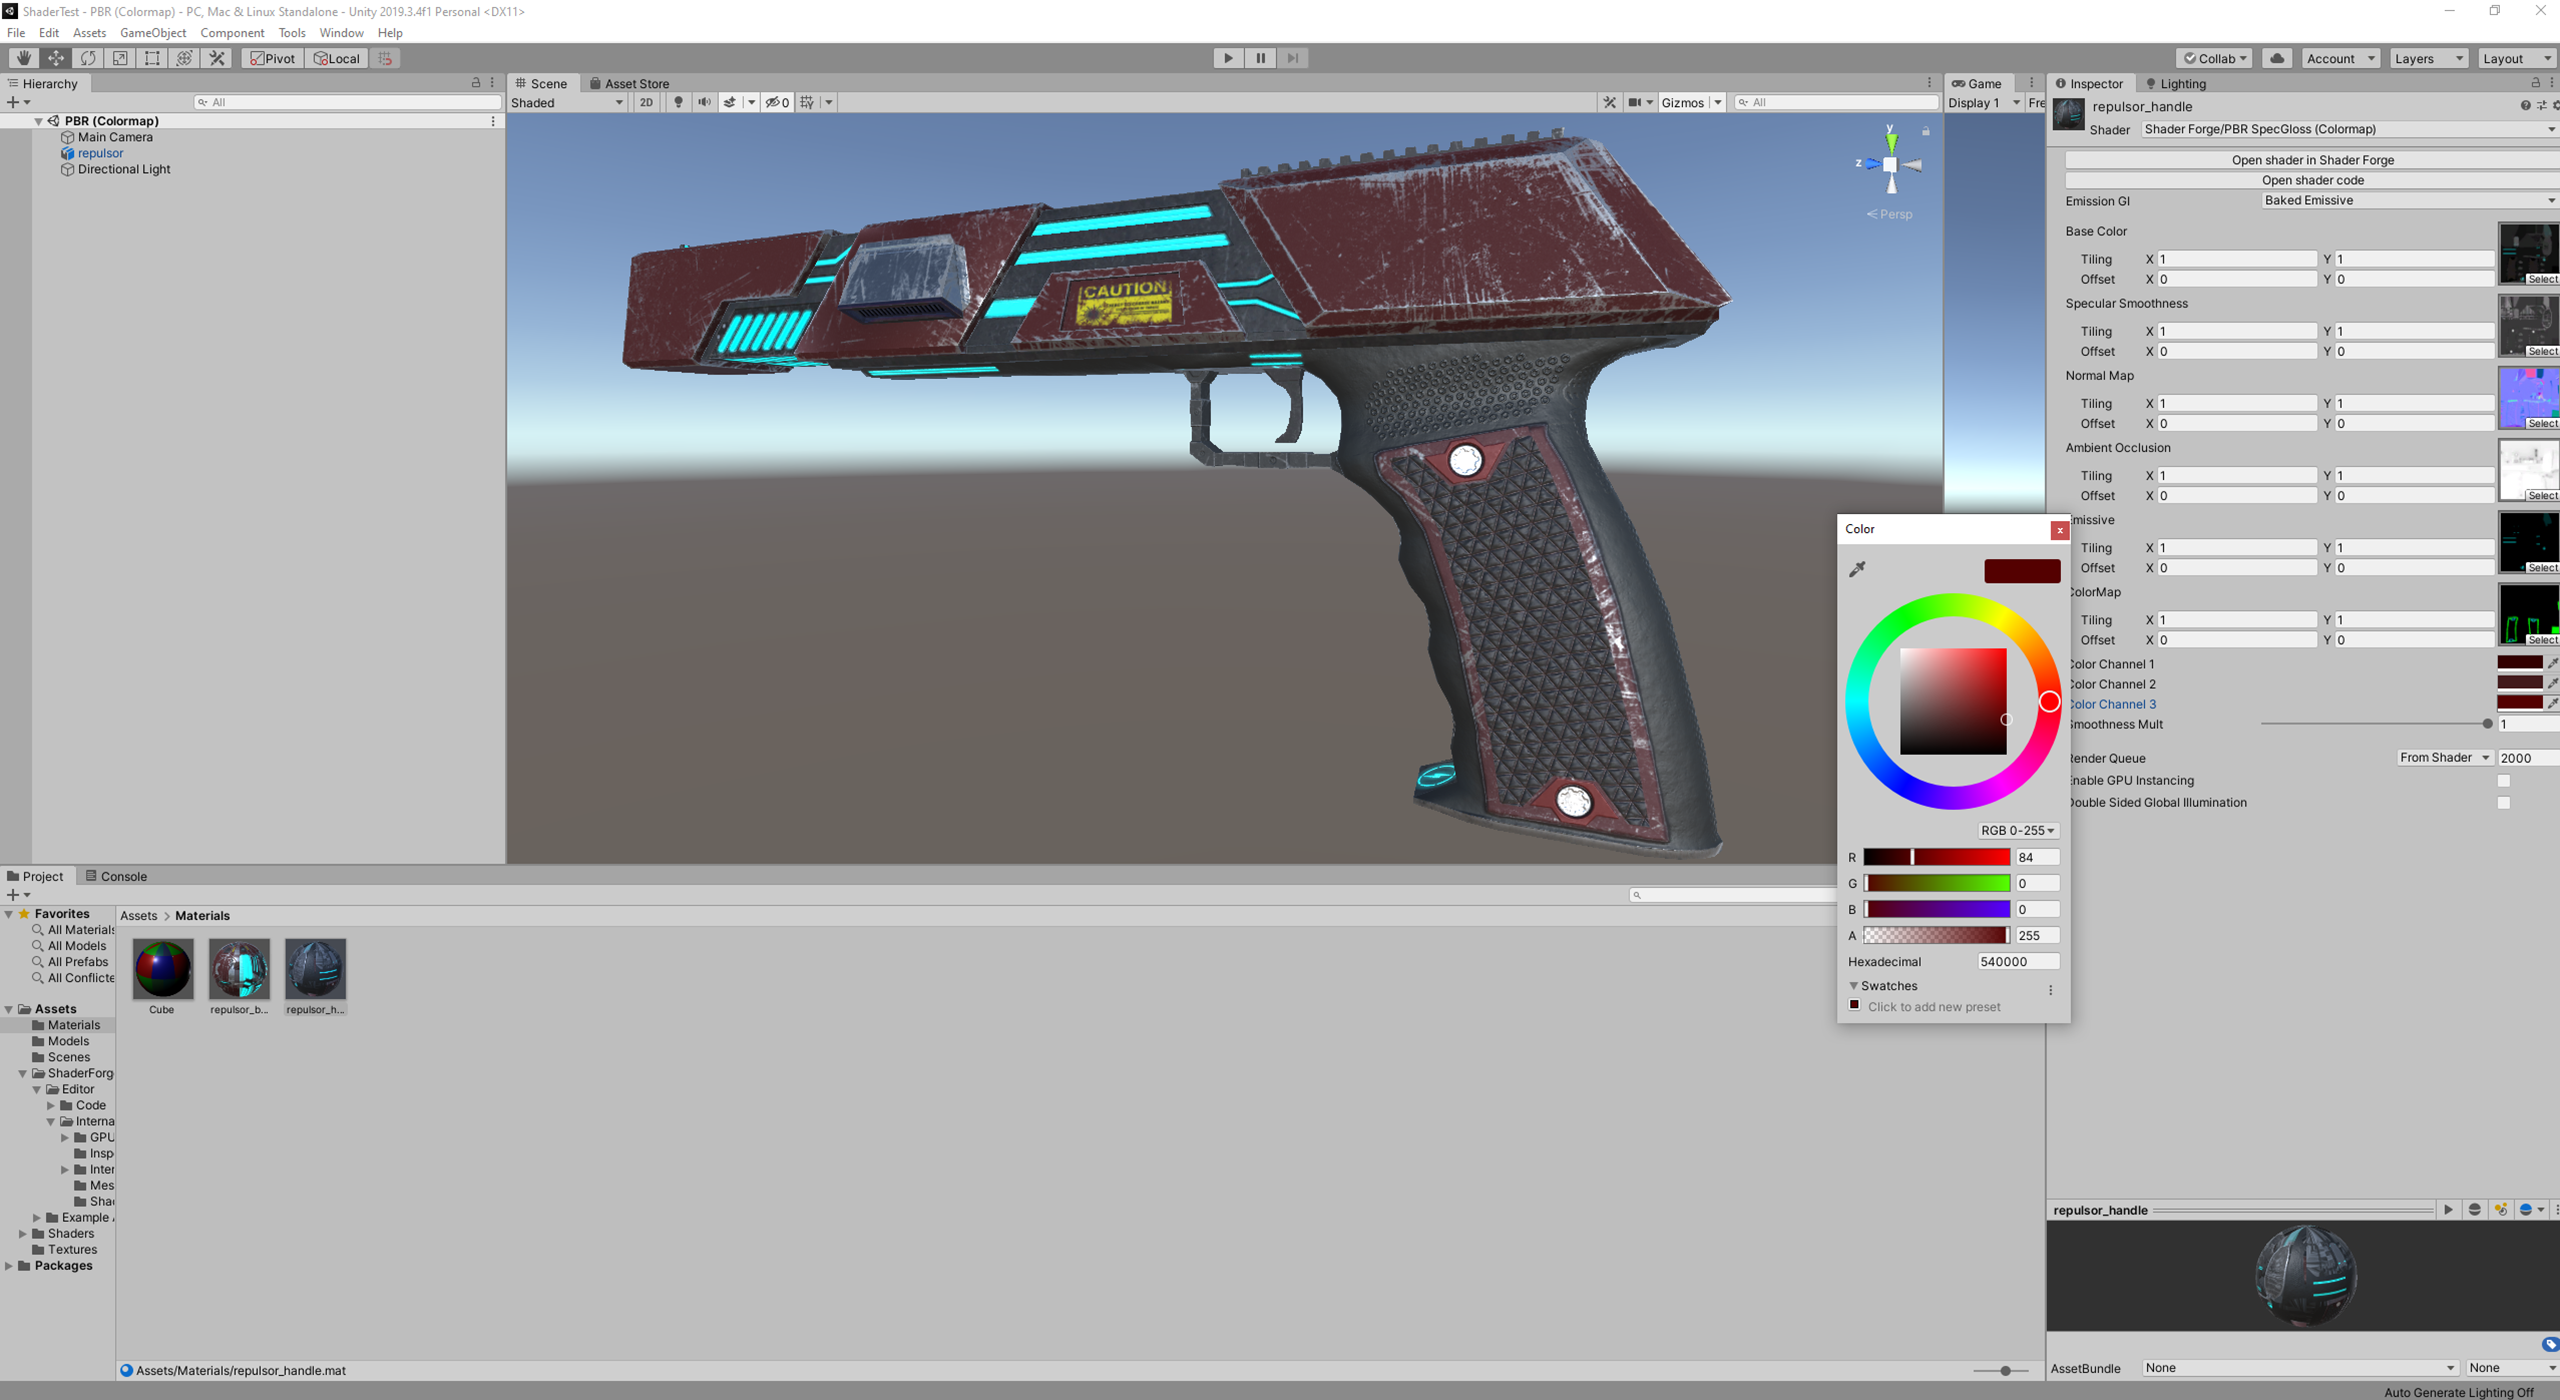
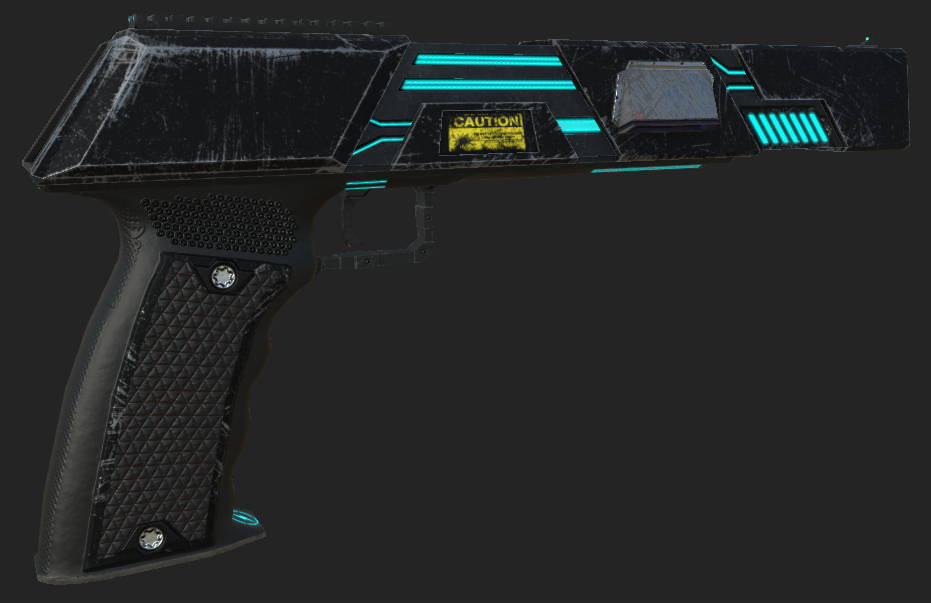
Now for the big bit of this week’s work. I downloaded a Unity plugin called Shader Forge, since I didn’t feel like continuing in to learn how the heck the actual Shader Fallback stuff worked in raw HLSL or CG shader code. The reason for this is that I wanted to vastly improve the value of the Repulsor Pistol model. Before this, the Repulsor only came in blue, and that’s it. And seeing how the Unity Asset Store enforces a minimum cost of $5, it was a bit overpriced in my opinion.
So, I dug my face into Shader Forge and developed myself a PBR Shader that supported a Color Map and three recolor channels.
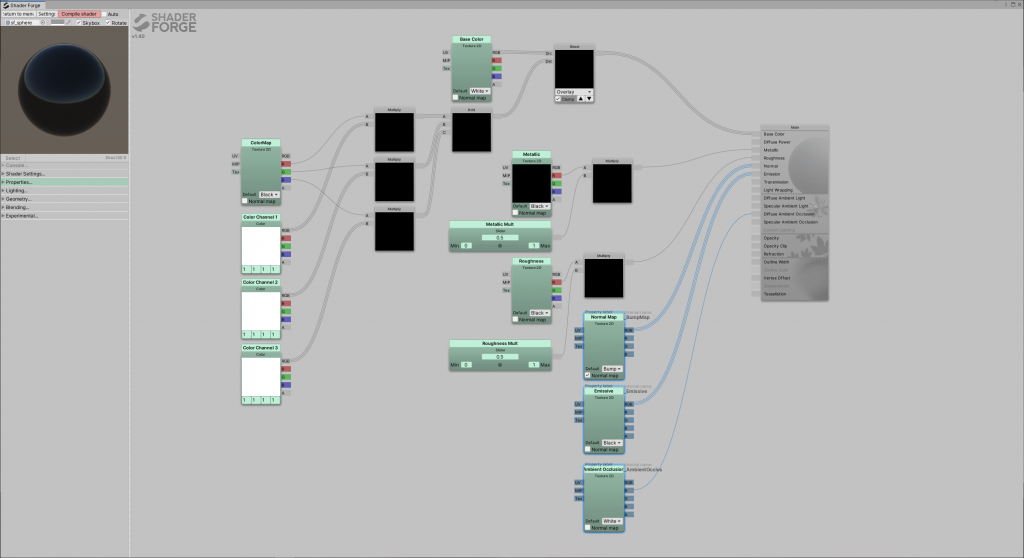
The above is a Physically-Based Rendering Shader (Metal-Rough layout) for the task. I’m going to look into releasing this on the Unity Asset Store for free as a dependency once I figure that bit out, and will probably be posting it here as a free download as soon as I finish ironing out any kinks that pop up.
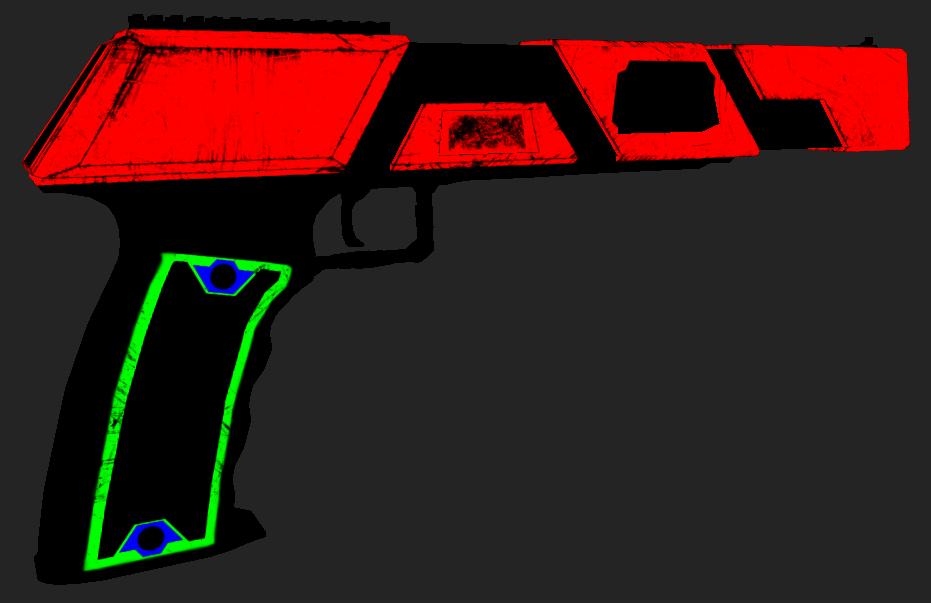
In the above swanky slider comparison widget thing that comes with this WordPress theme, you can see how the new Shader is set up. First, I made all the colored bits black, so it didn’t affect the final coloration. Next, I figured out how, in Substance Painter, to make a new Map type. In this case, Recolor Channel 1 is the Red channel of the color map, Channel 2 is Green, and Channel 3 is Blue. This allows for three separate layers of recolor and, theoretically, blending between them.
All I ended up having to do in Substance Painter was to blacken all the bits I wanted to recolor, then enable the Colormap on the layers I wanted to affect. Unfortunately, I couldn’t find a way to make Substance Painter default a map to black when not drawn to, so I also had to drop in a map-wide fill layer on the very bottom to fill everything in to black. After that, it’s just a matter of ordering the Colormap layers in such a way that the scratches and other masking affects them properly.
The ending effect of all this is that I can now recolor the Repulsor at will, and have started retroactively applying it to my other models (so far I have done the plastic bin, seen above).